How to Build a Pond
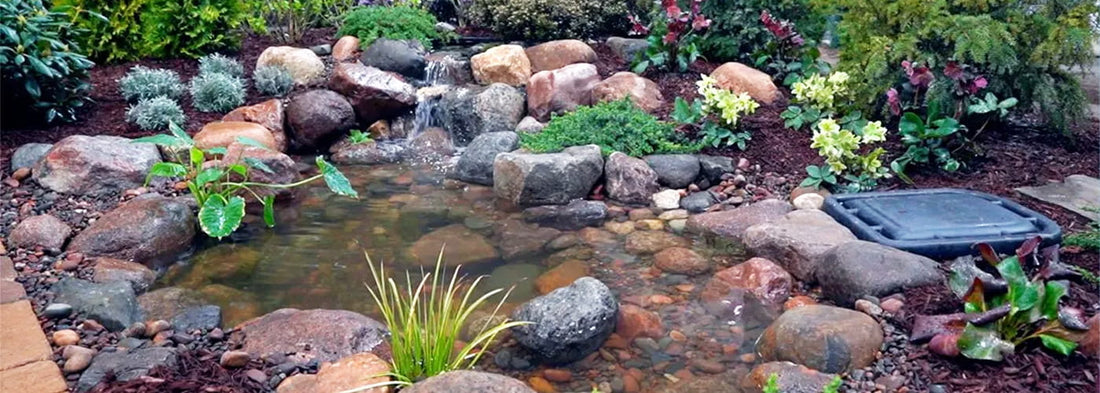
If you want to learn how to build a pond that is not only functional but also looks like it is a naturally formed part of your landscape, this article covers everything you need to know to do just that.
Tool for the installation:
- Utility knife
- Screwdrivers (flathead and robinson)
- Channel-lock pliers
- Scissors
- Inverted marking spray paint
- Tape measure
- Carpenter’s level
- Soil temper
- Shovel
- Wheelbarrow
- Construction pencil
- Cleanout Pump with hose or water vacuum
Step 1 – Location and Shape
Determine the location of the pond, its size, and its shape. We recommend choosing a location that will allow the waterfall to be visible from the part of your house where you spend a lot of time, such as your kitchen. This way the pond can be enjoyed both from the backyard and from inside the house.
Use a garden hose to lay out the shape of your pond. When you have decided on the shape, trace it with spray paint and remove the hose.
Step 2 - Positioning BioFalls and Skimmer
Aquascape has 3 sizes of BioFalls. BioFalls 1000, BioFalls 2500 and BioFalls 6000 for ponds up to 1000, 2500 and 6000 gallons respectively.
Aquascape also has 3 sizes of Skimmers. 200, 400 and 1000 for ponds with surface area of 200, 400 and 1000 square feet respectively.
Skimmers and BioFalls filters make up the filtration system of the pond, keeping the ecosystem in balance. This balance is crucial for the quality of water, keeping it clean and safe for fish.
Place the BioFalls about half a foot away from the outside of the pond line where you want the waterfall to be. BioFalls will be the starting point of the waterfall.
For an average-sized pond (10 feet x 10 feet) the ground level is enough for the BioFalls to sit to create the waterfall. You can always elevate it higher or place it further away from the pond, but keep in mind you would need considerably more soil for the elevation and natural-looking berm transition into the landscape.
Place the Skimmer just outside the pond line on the opposite side of the BioFalls. The water current will be flowing from BioFalls into the Skimmer. Do not place the Skimmer close to the BioFalls to make sure the water current will go through as much area as possible for proper circulation and water filtration.
A pump will be sitting inside the skimmer, pulling water into it and skimming any debris floating in the pond. The water from the skimmer will be channeled into the BioFalls filter and spilling from it, creating a waterfall.
Step 3 - Laying Plumbing, Connecting and Leveling BioFalls
Lay down the 2” Flexible PVC Pipe from the back of the BioFalls to the skimmer. Keep the pipe outside of the pond and leave the excess length at the Skimmer’s side.
The BioFalls filter comes with all the components needed for its installation as well as instructions. Attach a bulkhead fitting onto the opening at the back of the BioFalls.
Pull the bulkhead with only the rubber washer from the inside of the BioFalls. Put the plastic washer on and tighten the nut. Do not over-tighten to not strip the thread. One spin with pliers after hand-tightening will do the trick. If you see the rubber seal inside the BioFalls swell up just a bit, it means it is sealed.
Thread in the male adapter (MPT x Socket) into the bulkhead on the outside of the BioFalls. Before threading it in, add some black silicone from the component kit around the thread to ensure a waterproof seal. Same as with the bulkhead, one spin with pliers after hand-tightening will do the trick.
Apply Aquascape Christy's Red Hot Blue Glue to both the inside of the male adapter and the outside of the pipe. Then push the pipe into the male adapter while giving it a slight twist.
Secure the BioFalls by digging it a couple of inches into the ground. Before placing the BioFalls, compact the soil underneath it with a temper. This will prevent the soil from shifting with time, which would unlevel your waterfall.
Level the BioFalls, using the carpenter’s level. The BioFalls should be level side to side and slightly tilted forward towards the pond. You can achieve this by adding more soil or gravel underneath the BioFalls. Compact it every time you add more.
Backfill the BioFalls with soil to secure it in place. As you do it, ask someone to hold it in place to make sure the BioFalls stays level.
Step 4 - Excavate Pond Basin
Excavate the first layer of the pond. Dig out one shovel’s depth equally throughout the whole pond area. We’re aiming to have 9 to 11 inches of depth. This will be the level of the first/top shelf. Use the excavated soil to backfill the BioFalls further, bury your plumbing and create a berm around the waterfall. As you fill up the berm, keep compacting it. You would need most if not all the excavated soil for the berm to make it wide and at a low angle. This will make your waterfall transition into the landscape most natural looking.
Mark you next shelf layer. To make it look more natural do not just trace the first shelf contour. A shape that's not repeated looks best. We recommend leaving more of the shallow shelf space (the first layer) at the back of the pond for plants and also next to the skimmer to make it easier to hide it. It is also a good idea to make the second (deeper) layer close or even right against your patio or viewing area, so the fish are more prone to come to the viewing area. Dig down another shovel’s depth. Again, use the excavated soil for the berm.
Optionally, mark and dig the third shelf level using the same technique. Try not to make the last, deepest shelf too small. We recommend keeping it at least 4-foot by 4-foot or bigger. If you make it too small, the rocks would take most of the space, almost fully hiding the shelf. It is a good idea to cut the second layer smaller to keep the deepest layer bigger. The second layer doesn't need to be big by all means. Even a fairly small area will make a good transition. Same as before, use the excavated soil for the berm.
For the average sized pond (10’x10’) 2 to 3 shelf layers is enough. If you are building a larger pond you can have more shelves as you'd have more room for them to gradually and naturally go deeper. Starting from the second (from the top) shelf, you can make them deeper. The first shelf level we recommend keeping at 9 to 11 inches deep, which will be approximately 6 to 9 inches down from your water level as this height best accommodates marginal water plants.
Step 5 - Placing Skimmer at the Right Height and Hiding Plumbing
Dig the skimmer into the ground. The Skimmer’s face should be flush with the edge of your pond. The rubber liner will come right against it. The water level should be about 1 inch below the top of the Skimmer's face opening. Keep in mind that the water will be about 3 inches below the ground level.
If the water level is set too high, the skimmer won't be pulling the surface water, leaving the debris in the pond. If the water level is set too low, the water flow won't be sufficient to keep the skimmer pump submerged, damaging the pump.
Same as with the BioFalls, tamper the soil underneath the Skimmer. Level it both side to side and front to back. Ask someone to hold the Skimmer down or stand inside it while backfilling it with soil. Use the extra soil for the berm.
Pull the Flexible PVC pipe through a side hole of the Skimmer and trim it, so it just reaches the bottom of the Skimmer. Bury the rest of the pipe that wasn't covered by the berm. We recommend burying it roughly 4-6 inches below the surface.
Step 6 - Installing Underlayment and Liner
To calculate how much underlayment and liner you need, add the total elevated depth of the pond multiplied by 2 to your dimensions and then add 2 more feet. When taking the measurements, include the distance and height of the waterfall. The extra 2 feet will give you 1 foot of the liner extra around the pond, which will guarantee that the water will not be leaking through one of the edges. You will need that extra foot when adding rock into the pond which will pull more liner to the center. We also want to have that extra liner to make the liner connection to the Skimmer and to the BioFalls easier.
Example: A pond size is 8 feet by 12 feet at its widest points (including the waterfall). The deepest area of the pond is 3 feet and the waterfall is elevated by 1 foot.The liner size we would need is (8 + ((3+1) * 2) + 2) by (12 + ((3+1) * 2) +2), which comes to 16 feet by 20 feet.
Before you place the underlayment, look through the excavated basin and remove any bigger rocks and debris. The underlayment protects the liner, but doesnt make it puncture-proof. Place and center the underlayment in the basin. Push the fabric down to trace the shape of the basin. Then do the same thing with the liner.
Step 7 - Attaching Liner to Skimmer
It is best for two people to work on the Skimmer installation. Hold the liner flat against the Skimmer’s face. Make sure to leave some liner slack at the bottom of the skimmer. This will become very important when placing rock. If there isn’t enough slack, the rock will pull down on the liner, not only stretching it but also potentially breaking the seal with the skimmer plate. The cut-out hole in the liner should be smaller than the Skimmer’s opening. To do so, trace the rectangular skimmer hole on the liner with a construction pencil. Then mark another rectangle about 1 inch smaller all the way around inside the firstly marked rectangular. Cut out the smaller rectangle with a utility knife.
Push the skimmer face plate through the hole in the liner. The flat side should be outside the Skimmer facing the pond, and the narrower side where the weir door connects should be at the bottom (refer to the Skimmer’s instructions).
Add silicone to the face of the Skimmer. Trace a full rectangle bead with the silicone, covering all of the screw holes. Tighten and flatten the liner around the skimmer face plate before putting it through the Skimmer’s opening. Press it against the skimmer to minimize any movement while securing it with the screws provided with the Skimmer. Make sure there aren’t any liner folds against the Skimmer, or it will not seal properly resulting in a leak.
Install the skimmer door into the opening. It should be floating inside the Skimmer with the black side up.
Step 8 - Adding Rocks and Gravel
First calculate how much rock you will need. For the pond to look most natural, we use small, medium and large boulders as well as river rock gravel. The small, medium and large boulder ratio we recommend going with is 1:2:1, accordingly. The formulas below take this ratio into the account.
Formula for the amount of river rock gravel in tons: the pond’s length (ft) x width (ft) / 40
Formula for the amount of small boulders (6-12”) in Tons: total linear feet of all your ledges, including all the shelves x 0.04 * 1/4
Formula for the amount of medium boulders (12-18”) in Tons: total linear feet of all your ledges, including all the shelves x 0.1 * 1/2
Formula for the amount of large boulders (18-24”) in Tons: total linear feet of all your ledges, including all the shelves x 0.2 * 1/4
Example: We have an 8' x 12’ pond with 3 shelves. Top shelf has a circumference of 30 feet, the second one - 20 feet, and the last one - 13 feet.
- River rock gravel we would need: (8 x 12) / 40 = 2.4 ton
- Small boulder (6-12”) we would need: (30+20+13) * 0.04 * 1/4 = 0.63 ton
- Medium boulder (12-18”) we would need: (30+20+13) * 0.1 * 1/2 = 3.15 ton
- Large boulder (18-24”) we would need: (30+20+13) * 0.2 * 1/4 = 3.15 ton
You can use any kind of stone for your pond (river rock, sandstone, granite, moss rock etc.), but don't mix them together. It looks most natural if you pick one type of stone and stick with it for the whole pond.
Cover the walls of the shelves with boulders. Always start from the lowest layer and work your way up. If you start adding rock from the top, it will pull some liner from the center as the rock tucks and tightens the liner. This would make linker stretched at the bottom, which may lead to a potential tear. Mix and match all 3 different sizes as you go to make it look most natural. If you use the same size rock all around it would look men-made.
When placing boulders make sure they are very stable and not moving. Twist and turn the boulder until it sits solid. If you cannot position a boulder stable enough, try another boulder instead. This becomes especially important when covering taller shelf edges as you might need to stack some boulders on top of each other. You can use smaller rock or even gravel to lock in place bigger stones. If you need to stack the boulders higher, it is a good idea to use larger size boulders.
The stone around the walls of each shelf should come out a little bit higher than the shelf itself. This will help to hide the liner at the edges of the shelves. And also, it will stop the river rock gravel that sits on the selves from sliding down the edge, which would, again, expose the liner. The same goes for the top layer to help to blend it in with the landscape and hide the liner on the edges of the pond.
To hide the Skimmer, build up the stone on two sides of the Skimmer’s intake and then place a bridge stone on top of them, hiding the intake. The bottom of the bridge stone should sit above the water level, to let the debris easily flow through it into the Skimmer. More of a flat stone would work best for the bridge. After you have placed the rocks around the Skimmer, you can backfill it more with soil if needed.
Use the river rock gravel to fill in all the gaps in between the boulders to further stabilize them and make it look more natural. You can also use the gravel to backfill some of the larger boulders if you want to place them a little bit away from the wall. Fully cover the flat surfaces of the shelves and the bottom of the pond with the river rock gravel.
Step 9 - Connecting Skimmer Pump
Signature Series 200 Pond Skimmer can handle up to 3,000 GPH and we recommend using AquaSurge 2,000 - 4,000 GPH Adjustable Flow Pump. This pump will give you more flexibility with the waterflow strength, making it easy to reduce or increase the sound and effect from your waterfall. You can also use AquaSurge 2,000 or AquaSurge 3,000 pumps.
Signature Series 400 Pond Skimmer can handle up to 3,000 GPH and we recommend using AquaSurge 2,000 - 4,000 GPH Adjustable Flow Pump as well. You can also use AquaSurge 3,000 or AquaSurge 4,000 pumps.
Signature Series 1000 Pond Skimmer can handle up to 10,000 GPH and we recommend using AquaSurge 4,000 - 8,000 GPH. You can also use SLD 5000-9000 Adjustable Flow, 9PL 7000 Solids-Handling or 12PN 10000 Solids-Handling pumps.
AquaSurge pumps and Dual Union Check Valve 2.0 come with the fittings necessary for your connection. Attach the Check Valve horizontally to the pump (refer to the Dual Union Check Valve 2.0 instructions). Make sure to connect the Check Valve the right way, otherwise it will completely stop the flow of water. Place the pump at the bottom of the skimmer, making the other end of the Check Valve face to the pipe. Trim your pipe and glue it to the Check Valve using Christy's Red Hot Blue Glue (apply glue to both the pipe and the Check Valve fitting).
Signature Series 400 and 1000 Pond Skimmers also come with an overflow fitting, which is attached to the opening on the opposite side from your pipe. Install it on the inside of the skimmer, facing upwards.
When the pump is in place, slide the skimmer net in front of the pump into its slot. Trim the top of the liner flush with the Skimmer and put the skimmer lid on.
To hide the Skimmer easier you can purchase a skimmer rock lid which looks like a real stone and easily hides the skimmer, blending it in with the landscape.
Step 10 - Attaching Liner to BioFalls
The installation of the BioFalls is very similar to the one of the Skimmer. Hold the liner flat against the Skimmer’s face. It is as important as with the Skimmer to leave some liner slack at the bottom of the BioFalls for the same reasons.
Align the spillway lip with the face of the BioFalls. Put two screws (come with the BioFalls components) through the top of the spillway lip and the liner. One on each side. This will secure the liner to the spillway lip, keeping it aligned. Peal the liner with the spillway lip back. Add silicone to the face of the BioFalls. Trace a continuous bead with the silicone covering all of the screw holes. Attach the spillway lip to the BioFalls face, using the two already inserted screws as your guide. Press it against the skimmer to minimize any movement while securing it with the remaining screws. Make sure there aren’t any liner folds against the BioFalls, or it will not seal properly resulting in a leak.
Trim the liner flush around the top of the lip only, but keep the extra liner around the BioFalls.
Step 11 - Building the Waterfall
Use large framing rocks on the sides of the waterfall and a smaller rock in between them. To achieve the most natural look, there should be only one framing rock on each side for every step up of the waterfall. We want to avoid stacking framing rocks on top of each other as it will most definitely ruin the natural look. If you want to make a waterfall step bigger, look for bigger framing rocks. Ideally, the framing rocks should be taller than the waterfall step. When placing the framing rocks, position them asymmetrical or even tilted a bit to make it look even more natural.
The rock in the middle should sit below the framing rocks. This will not only guide the water, but also mimic waterfalls in nature. When building a waterfall with multiple steps down, start with the lowest one, closest to the pond. Place two framing rocks and the middle one. Back fill them with river rock gravel creating the next step up shelf. For the next waterfall step, place the framing rocks on the made shelf, offsetting them back. This will create a look of waterfall steps and not just rocks stacked on top of each other.
It is best to use more of a flat rock in the middle of the waterfall right next to the BioFalls to make the water spread out more evenly. Position this rock higher than the BioFalls spillway lip to hide it.
Backfill the gap between the rock and the BioFalls about ¾ way up. Fill the rest of the gap with the black waterfall foam. Remove the top layer of gravel from your waterfall steps (shelves) and then cover them with a solid layer of foam. Also foam all the gaps on the sides of the waterfall to prevent the water from escaping through them, directing the waterfall into the desired direction. Let the foam harden for about 10 to 15 minutes before covering it back with river rock gravel. The foam will still be somewhat flexible, allowing the gravel to sink into it.
Add some more large rocks on the sides of the waterfall, slightly wrapping them around the BioFalls, to help retain the soil of the berm from shifting into the pond. You might need to add more of the support rocks, building a retaining wall, depending on how wide your berm is.
Step 12 - Washing Rock and Gravel, Filling Up
Set up a drainage pump at the bottom of the pond for taking the dirty water out as you wash the rock and gravel with the water hose. It is best to use a drain pump that has a low level intake with a longer hose to pump water further away from the pond so as not to make a mess. You can also use a two chamber water vacuum such as PondoVac, or even a ShopVac. If none of these options are available, you can use the skimmer pump with the leftover pipe.
Wash the rock and gravel starting from the top and going down as the dirt from the top layers will be going down to the bottom layers. As you wash the gravel, it is a good idea to keep mixing it with your hands to take out as much dirt as possible. Keep in mind that you won’t be able to fully clean out all the dirt from the pond, and when you fill it up it still will be a bit cloudy. But if you clean out a bigger chunk of dirt, this cloudy water will clear out in days instead of weeks.
Start filling up the pond.
Step 13 - Finishing the Berm, Adding Accent Rocks
Build the berm to be flush with the BioFalls. To make the berm look like a naturally formed hill, make the berm go level from the BioFalls point for two to three feet and only then start slightly sloping it down.
If you don't have much space in the back of the pond to fully accommodate this slight slope, build a retaining wall at the end of your berm. This will allow you to keep the naturally looking slope angle. Instead of having a sharp slope, looking like a volcano, you will end up with a slight and smooth slope hitting the retaining wall.
Place a few of the large boulders around the berm as accent rocks. It will help to spruce up the landscape.
Step 14 - Adding Filter Media to BioFalls
Clean the inside of the BioFalls from the dirt. BioFalls comes with filter mats, bioballs and media net. Place the two filter Mats inside the BioFalls. They should sit just above the bulkhead. Open the bag with the BioBalls and add them into the media net. We recommend getting another bag or two of BioBalls and adding them into the media net for better filtration. Place the media net with the BioBalls on top of the filter mats. Spread them around covering all of the surface.
The BioFalls will be hidden with plants planted around it on the berm. BioFalls 2500 and 6000 come with a BioFalls Rock tray to help conceal the edges of the BioFalls. You can fill the tray either with rock or even with some plants. Another option is to use one of the Aquascape’s Faux Driftwoods. Lastly, you could look for a flatter stone or slab to cover the BioFalls.
Step 15 - Trimming Liner, Finishing Edging
Before trimming the liner, wait for the water to fill up to the desired level. Trim the liner leaving about half a foot extra length. To do the edging, press the liner to the back side of the rock and fold the extra liner length down into the ground. Bring the soil right against the liner. You will end up with liner sandwiched between the rock and the soil.
In the areas where you don't have extra liner slack, or the water level is close to the edge of the liner, backfill the liner with soil without folding it in.
If you see any places where the liner falls into the pond in between bigger rocks, fill these spots with gravel, supporting the liner from the inside of the pond.
Use leftover rocks and gravel to cover the liner and blend in the edge of the pond with the landscape.
Step 16 - Starting the Pond
Plug in the pump and enjoy the pond!
After you start the pond, you still can tweak the waterfall a bit if you like. You can use some pieces of gravel or stone to direct the water differently or even split in the middle.
